
Facebook Offline Conversion Tracking: Complete Setup Guide
The iOS 14.5 update in April 2021 fundamentally changed Facebook advertising. Overnight, the wealth of user data from iPhone users disappeared, crippling campaign performance for most of that year.
Facebook’s response was twofold: modeled data to fill attribution gaps, and Conversions API to bypass browser limitations. While these solutions helped, they also opened the door to more sophisticated tracking methods—including offline conversion imports.
Over the years, a host of use cases have evolved using Conversions API, referred to as offline conversion importing. We’ll review some of these use cases and how to set it up, but first, a refresher on offline conversion importing.
Skip straight to the setup guide
TL;DR
iOS 14.5 killed Facebook’s tracking accuracy, but offline conversion imports can restore it. By capturing Facebook’s tracking parameters (FBC/FBP) plus customer data (email, phone) in your forms, then uploading conversions via API, you get dramatically better attribution.
Useful for lead qualification, long sales cycles, cross-channel tracking, and revenue attribution.
Setup involves: capture data → format for Meta → connect via API.
Understanding Facebook Offline Conversion Tracking
Offline conversion tracking captures customer actions that happen outside the browser—phone calls, in-store purchases, sales meetings. By uploading this data to Meta, you can attribute these conversions back to your original ad campaigns.
Similar to importing offline conversions with Google Click ID (GCLID), Meta’s Conversions API ingests data about a customer and uses that to match to user profiles on their platform.
The difference is in matching. Whereas Google uses GCLID, Meta uses Facebook Browser ID (fbp) and Facebook Click ID (fbc) to track users sessions and ad clicks.
The Power of FBC/FBP
Facebook browser ID (fbp) is stored in the user’s browser and acts as a user ID that’s generated regardless of whether an ad click occurs.
Facebook click ID (fbc), similar to GCLID, is generated only when a user clicks and is stored in the URL. This is the core method for attributing conversions back to an ad interaction.
Alone, these identifiers are able to match back to users on the Meta platform. Together, match rates improve significantly.
This transforms what is typically a probabilistic attribution model—where Meta ‘thinks’ it knows what happened and creates a correlative connection—into a more deterministic model where Meta knows exactly what happened.
Customer Identifiers: Connect Across Devices
Beyond tracking IDs, customer identifiers provide another crucial piece of the attribution puzzle. Customer identifiers are information provided at the point of sale or data submission, such as in a lead form on site or during a phone call with a call center.
The key forms of customer identifiers are email address and phone number, but Meta also tracks:
- First and last name
- City, state, and country
- Date of birth
- Gender
- External ID (your internal customer ID)
These act as additional data points to tie back to customer profiles and, most importantly, facilitate matching across time and devices. When a customer interacts with your ad on their phone but converts on their laptop days later, these identifiers help Meta connect the dots.
Attribution: Tying it all together
Together with Facebook’s tracking IDs (fbc/fbp), customer identifiers create a comprehensive graph of anchor points for attribution. With shifts towards privacy over the last 5 years, setting up these redundant tracking methods has become increasingly necessary. These steps take a probabilistic measurement system and move it closer to being deterministic.
Two key points to keep in mind:
- User data must be shared in a privacy-safe manner (hashed when required)
- Storing identifiers requires proper setup in forms and CRM environments
This comprehensive approach to data collection sets the foundation for successful offline conversion tracking implementation.
How To Setup Meta Offline Conversion Tracking
Setting up offline conversion tracking starts with capturing the right data. While some fields are required, others can improve match rates and attribution accuracy.
Required Fields:
- Email Address (hashed)
- Phone Number (hashed)
- fbc/fbp (not hashed)
Optional but Recommended Fields:
- First Name (hashed)
- Last Name (hashed)
- City (not hashed)
- State (not hashed)
- Country (not hashed)
For a complete list of all supported customer identifiers and their formatting requirements, see Meta’s Customer Information Parameters documentation.
For the purpose of this example, we’ll focus on capturing the tracking parameters (FBC/FBP) and form data. The user will fill in their name, email address, and phone number, while we automatically capture the Facebook tracking parameters.
However, we don’t want to include fields for FBC and FBP that will cause confusion. To solve for this, we’ll create hidden fields and use JavaScript to populate them automatically.
Creating Hidden Form Fields
We’ve reviewed setting up hidden fields in the Google Click ID tracking guide. For a quick refresher:
- Set up hidden fields in form builder
- Name hidden fields according to parameters
- Set up JavaScript to populate the fields
Setting up hidden fields is dependent on the platform used to build the form. Most have it as a built-in feature.
Now that we’ve identified the required data fields, let’s walk through the technical implementation. We’ll start by setting up the tracking parameters that Meta needs for attribution.
Creating FBC in a Cookie
The first step in setting up the necessary data capture points is creating a cookie to translate fbclid into fbc.
The FBC format is: fb.1.[timestamp].[fbclid_value] where the timestamp represents when the click occured.
To do this a custom HTML tag extracts fbclid from the URL, appends the additional information, and stores it in a first-party cookie.
Note: We’re using localStorage because localStorage is the most persistent form of browser tracking and allows for better first-click attribution.
- Tag Type: Custom HTML
- Trigger: All Pages (or a specific Landing Page)
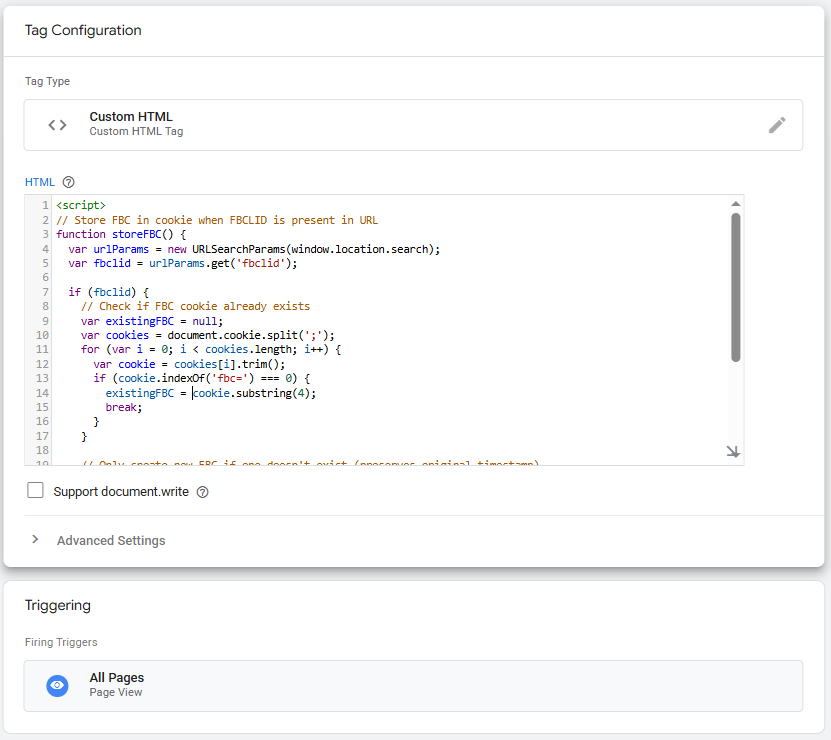
Detailed Code
<script>
// Store FBC in cookie when FBCLID is present in URL
function storeFBC() {
  var urlParams = new URLSearchParams(window.location.search);
  var fbclid = urlParams.get('fbclid');

  if (fbclid) {
    // Check if FBC cookie already exists
    var existingFBC = null;
    var cookies = document.cookie.split(';');
    for (var i = 0; i < cookies.length; i++) {
      var cookie = cookies[i].trim();
      if (cookie.indexOf('fbc=') === 0) {
        existingFBC = cookie.substring(4);
        break;
      }
    }

    // Only create new FBC if one doesn't exist (preserves original timestamp)
    if (!existingFBC) {
      var fbc = 'fb.1.' + Math.floor(Date.now() / 1000) + '.' + fbclid;
      document.cookie = "fbc=" + fbc + "; path=/; max-age=" + (90 * 24 * 60 * 60);
    }
  }
}

// Run when page loads
storeFBC();
</script>
Once this is done, a tag is needed to push all the necessary variables into the hidden fields.
Automatically Populating Tracking Parameters
The key to successful offline conversion tracking is capturing Facebook’s tracking parameters (FBC and FBP) from cookies and URL parameters. Here’s the JavaScript code that handles this automatically:
- Tag Type: Custom HTML
- Trigger: Page View
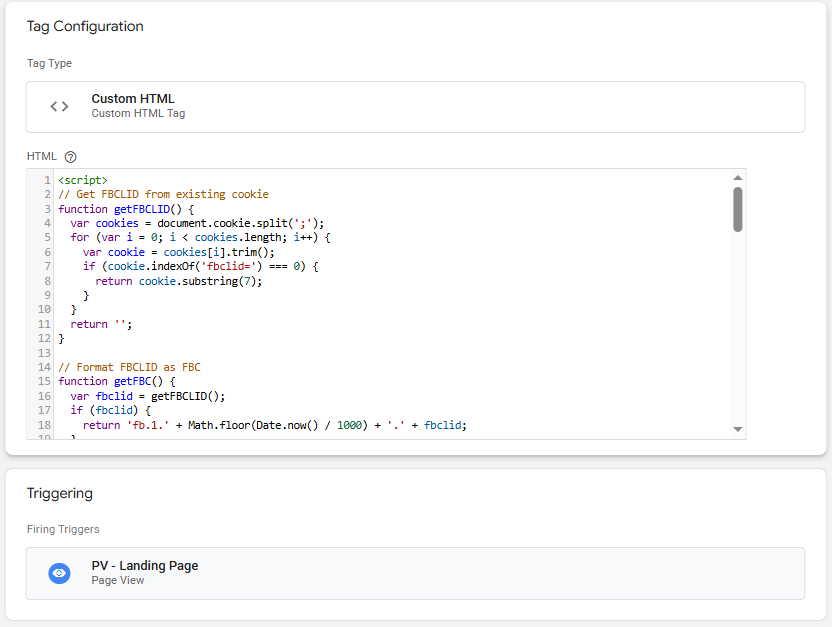
Detailed Code
<script>
// Get FBCLID from existing cookie
function getFBCLID() {
  var cookies = document.cookie.split(';');
  for (var i = 0; i < cookies.length; i++) {
    var cookie = cookies[i].trim();
    if (cookie.indexOf('fbclid=') === 0) {
      return cookie.substring(7);
    }
  }
  return '';
}

// Format FBCLID as FBC
function getFBC() {
  var fbclid = getFBCLID();
  if (fbclid) {
    return 'fb.1.' + Math.floor(Date.now() / 1000) + '.' + fbclid;
  }
  return '';
}

// Get FBP from Meta's cookie
function getFBP() {
  var cookies = document.cookie.split(';');
  for (var i = 0; i < cookies.length; i++) {
    var cookie = cookies[i].trim();
    if (cookie.indexOf('_fbp=') === 0) {
      return cookie.substring(5);
    }
  }
  return '';
}

function populateTrackingFields() {
  // Get URL parameters for UTM
  var urlParams = new URLSearchParams(window.location.search);

  // Facebook tracking - read from existing cookies
  var fbp = getFBP();
  var fbc = getFBC();

  // UTM parameters (these come from URL)
  var utmSource = urlParams.get('utm_source');
  var utmMedium = urlParams.get('utm_medium');
  var utmCampaign = urlParams.get('utm_campaign');
  var utmContent = urlParams.get('utm_content');
  var utmTerm = urlParams.get('utm_term');

  // Populate Facebook fields
  var fbpField = document.querySelector('input[name="input_20"]');
  var fbcField = document.querySelector('input[name="input_24"]');

  if (fbpField && fbp) {
    fbpField.value = fbp;
  }

  if (fbcField && fbc) {
    fbcField.value = fbc;
  }

  // Populate UTM fields
  var utmSourceField = document.querySelector('input[name="input_23"]');
  var utmMediumField = document.querySelector('input[name="input_22"]');
  var utmCampaignField = document.querySelector('input[name="input_21"]');
  var utmContentField = document.querySelector('input[name="input_26"]');
  var utmTermField = document.querySelector('input[name="input_25"]');

  if (utmSourceField && utmSource) {
    utmSourceField.value = utmSource;
  }

  if (utmMediumField && utmMedium) {
    utmMediumField.value = utmMedium;
  }

  if (utmCampaignField && utmCampaign) {
    utmCampaignField.value = utmCampaign;
  }

  if (utmContentField && utmContent) {
    utmContentField.value = utmContent;
  }

  if (utmTermField && utmTerm) {
    utmTermField.value = utmTerm;
  }
}

// Run when page loads
if (document.readyState === 'loading') {
  document.addEventListener('DOMContentLoaded', populateTrackingFields);
} else {
  populateTrackingFields();
}
</script>
To use this script:
- Update the
TRACKING_CONFIGobject with your form’s actual field names - Add the script to your landing page (and any pages with conversion forms)
- The script will automatically populate the hidden fields when the page loads
Finding Hidden Field Names
To find the field names, simply Inspect Element (right click + Inspect or ctrl + shift + i) – find the HTML that corresponds to each field and the input name.

In this case, the name was ‘input_1’. Each DOM element variable needs to be created with this input name. This will vary based on the form setup.
![Google Tag Manager DOM Element variable configuration showing CSS Selector method with 'input[name='input_1']' selector and 'value' attribute setting](https://fiveninestrategy.com/wp-content/uploads/2025/07/DOM-Element-Input-Name.png)
Once these are created for each user-provided variable (email, phone, etc.), the data needs to be hashed for privacy compliance purposes.
Hashing User Data
Facebook requires sensitive user data to be hashed using SHA-256 encryption before uploading. This can be down through two means:
- In the CRM or backend system (recommended)
- In the browser (less secure)
Note: FBC and FBP values should not be hashed- they are already anonymized.
Once your form captures both the user data and tracking parameters, you’ll be ready to import conversions back into Meta Ads Manager.
Importing Offline Conversions into Meta Ads
Now that the data is all captured in your backend system, it’s time to import it back into Meta using Conversions API.
Creating a Conversions API dataset
The following steps outline how to create a new dataset for offline conversion data:
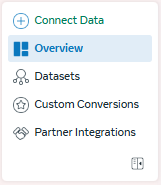
1. Navigate to Events Manager in your Meta Business Account
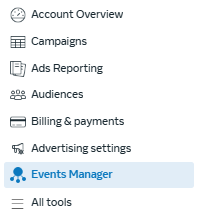
2. Click on ‘Datasets’ and then on the left hand side ‘Add Events’
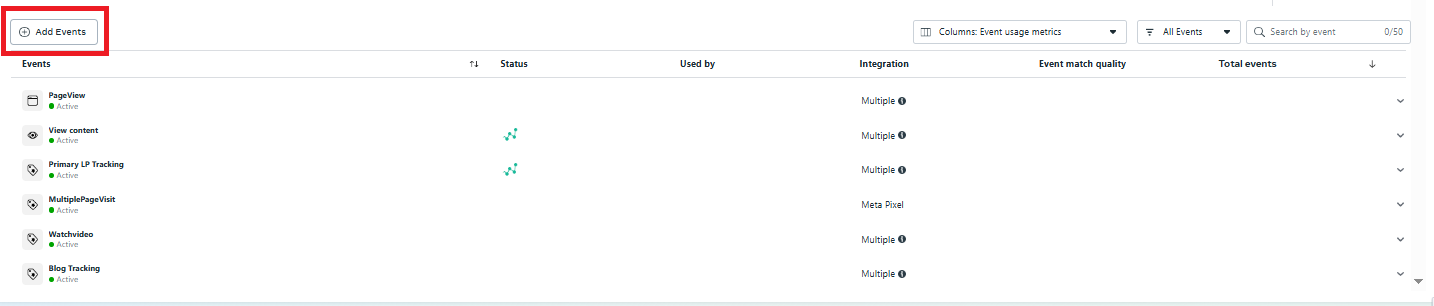
3. Select Your Pixel to Connect Conversions API
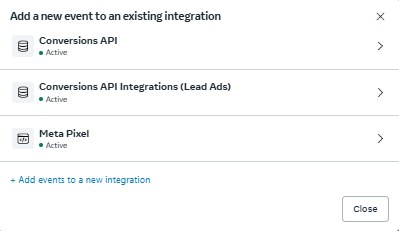
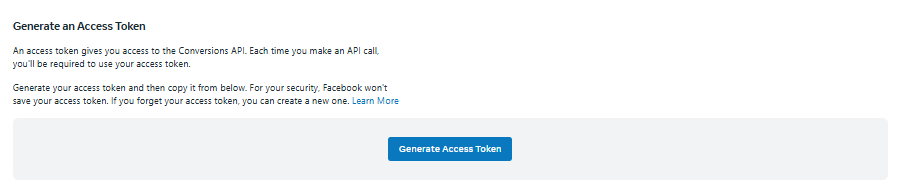
4. Click Get Started, and ‘Generate Access Token’
Configuring Event Parameters
Event parameters needs to be sent in a specific format to meet Meta’s requirements. What you’ll need:
Required Parameters:
- event_name: The conversion event (name this anything)
- event_time: Unix timestamp when the conversion occurred
- user_data: Object containing customer identifiers (email, phone, etc.)
- custom_data: Object containing any conversion specific data (optional)
These parameters will be formatted into a json object structure:
Example Payload
[
{
“event_name”: “[CREATE YOUR NAME]”,
“event_time”: 1678888888,
“user_data”: {
“em”: “2816913d80cf0d796df32130e527025816922b115b8134370d06173004e028b0”,
“ph”: “96b6379555c4d29193267d3e098801530932822a988d87a716c174360e2a2221”,
“fbc”: “fb.1.1678888888888.xxxx”,
“fbp”: “fb.1.1678888888888.yyyy”,
“client_ip_address”: “192.168.1.1”,
“client_user_agent”: “Mozilla/5.0 (Windows NT 10.0; Win64; x64) AppleWebKit/537.36 (KHTML, like Gecko) Chrome/100.0.4896.88 Safari/537.36”
},
“action_source”: “crm”
}
]
From here, the API call is ready to be setup in your CRM or backend system.
API Endpoint and Authentication
Your backend system will need to send POST requests to Meta’s Conversions API endpoint.
Endpoint: https://graph.facebook.com/v18.0/{dataset_id}/events
This can be found in the Payload Helper section of Conversions API setup
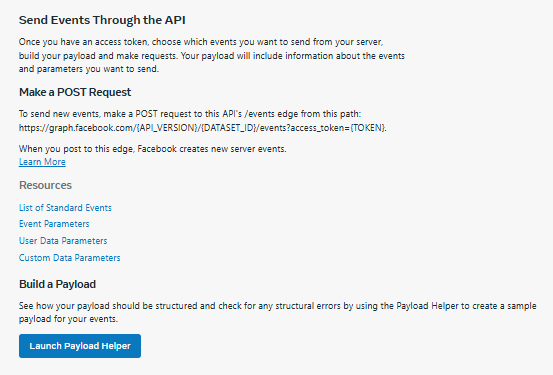
Certain headers may also be required detailing the format and authorization. The can be customized as follows:
- Authorization: Bearer {access_token}
- Content-Type: application/json
Once the API call is set up, it’s time to test that the payload is successfully being delivered.
Testing Your Event Setup
Start by accessing the ‘Test Events’ tab in the Meta Events Manager. Here you can select to test from web or CRM.
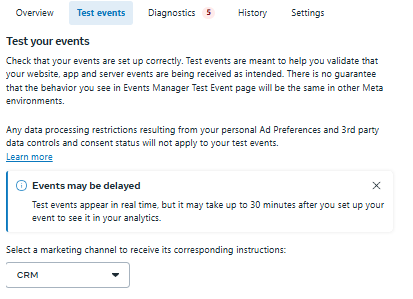
For this test, choose CRM and then the Page you want to test. A Lead ID will be generated.
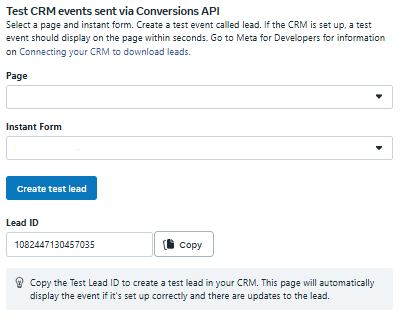
This Lead ID needs to be added to the payload, and a test lead needs to be submitted.
Example Payload
[
{
“event_name”: “[CREATE YOUR NAME]”,
“test_event_code”: “108244730457035”, // Added manually for testing
“event_time”: 1678888888,
“user_data”: {
“em”: “2816913d80cf0d796df32130e527025816922b115b8134370d06173004e028b0”,
“ph”: “96b6379555c4d29193267d3e098801530932822a988d87a716c174360e2a2221”,
“fbc”: “fb.1.1678888888888.xxxx”,
“fbp”: “fb.1.1678888888888.yyyy”,
“client_ip_address”: “192.168.1.1”,
“client_user_agent”: “Mozilla/5.0 (Windows NT 10.0; Win64; x64) AppleWebKit/537.36 (KHTML, like Gecko) Chrome/100.0.4896.88 Safari/537.36”
},
“action_source”: “crm”
}
]
A lead should show up in the ‘Test Events’ section, though it may take up to 30 minutes. This will help verify that all data is formatted properly.
Once this is confirmed, the test code can be removed from the payload. Just be sure keep everything else in the payload the same, or risk misconfiguring.
Why Implement Offline Conversion Tracking?
With iOS updates and privacy changes reducing browser tracking signals, Meta needs better data to match conversions back to ad interactions. Offline conversion tracking provides this through two key methods:
- FBC/FBP Tracking: Connects conversions to original ad clicks or browser sessions
- User Data Matching: Links cross-device engagement using email, phone, and other identifiers
Combined, these dramatically improve match rates and attribution accuracy. This solves for specific business challenges.
Lead Qualification
Import only qualified leads after your sales team has vetted them, giving Meta higher-quality conversion signals for optimization instead of all form submissions.
Key Takeaway: Solves for lead quality issues which can be problematic in Meta Ads
Long Sales Cycle Tracking
Bridge the gap between early engagement (like downloading a guide) and final purchase months later. Essential for B2B companies where consideration periods extend weeks or months.
Key Takeaway: This bridges the gap between early engagement and last click conversion.
Cross-Channel Integration
Track offline conversions from retail stores, phone sales, or in-person meetings by matching customer data back to original ad engagement.
Key Takeaway: Useful particularly for businesses that have retail stores or call centers.
Revenue Attribution
Connect actual purchase amounts to marketing campaigns, especially valuable when sales happen offline or through sales teams long after initial ad interaction.
For example, conversion lag can be up to 30 days for longer sales cycles, making short term optimization more difficult.
Key Takeaway: Improves ability to tie ROI to marketing efforts
Starting With Offline Conversion Importing
The key to successful offline conversion tracking is first identifying a clear business need. While browser tracking can be quite effective on its own, the real value of offline conversion imports lies in establishing enhanced conversion tracking methods.
Rather than simply using OCT imports as redundant conversion tracking (server side implementation can act as redundant tracking), establishing a new conversion tracking method is the real value.
Set up may seem technical at first, but can be boiled down to three key steps:
- Capture comprehensive data – Collect user data and browser tracking parameters in forms
- Format data for Meta – Structure conversion data according to API requirements
- Establish API connection – Set up automated data flow between your CRM and Meta Ads
With this framework, businesses can bridge the gap between online engagement and offline conversions. Start with one use case, test thoroughly, and expand as you see results. In today’s privacy-focused landscape, comprehensive attribution isn’t just helpful, it’s essential for maintaining competitive advantage.