
Google Tag Gateway Setup Guide: Stop Ad Blockers From Killing Your Data
For years, platforms like Meta, Pinterest, and Reddit have allowed advertisers to connect their web servers to ad platforms for enhanced website tracking through server-side tracking solutions like Facebook’s Conversions API.
Server-to-server setups like sGTM bypass browsers entirely avoid ad blockers and cookieless environments like Safari’s Intelligent Tracking Prevention. However, setup is notoriously difficult. Google’s latest product, Google Tag Gateway, offers a way around this.
Want to know if Google Tag Gateway or sGTM is better for you? Read the side by side comparison.
TL;DR
Google Tag Gateway routes your tracking tags through your own domain instead of googletagmanager.com, making them appear as first-party requests that bypass ad blockers.
Setup takes 15 minutes with Cloudflare automation or under an hour manually. This restores most lost conversion tracking without requiring complex server-side infrastructure.
What Is Google Tag Gateway?
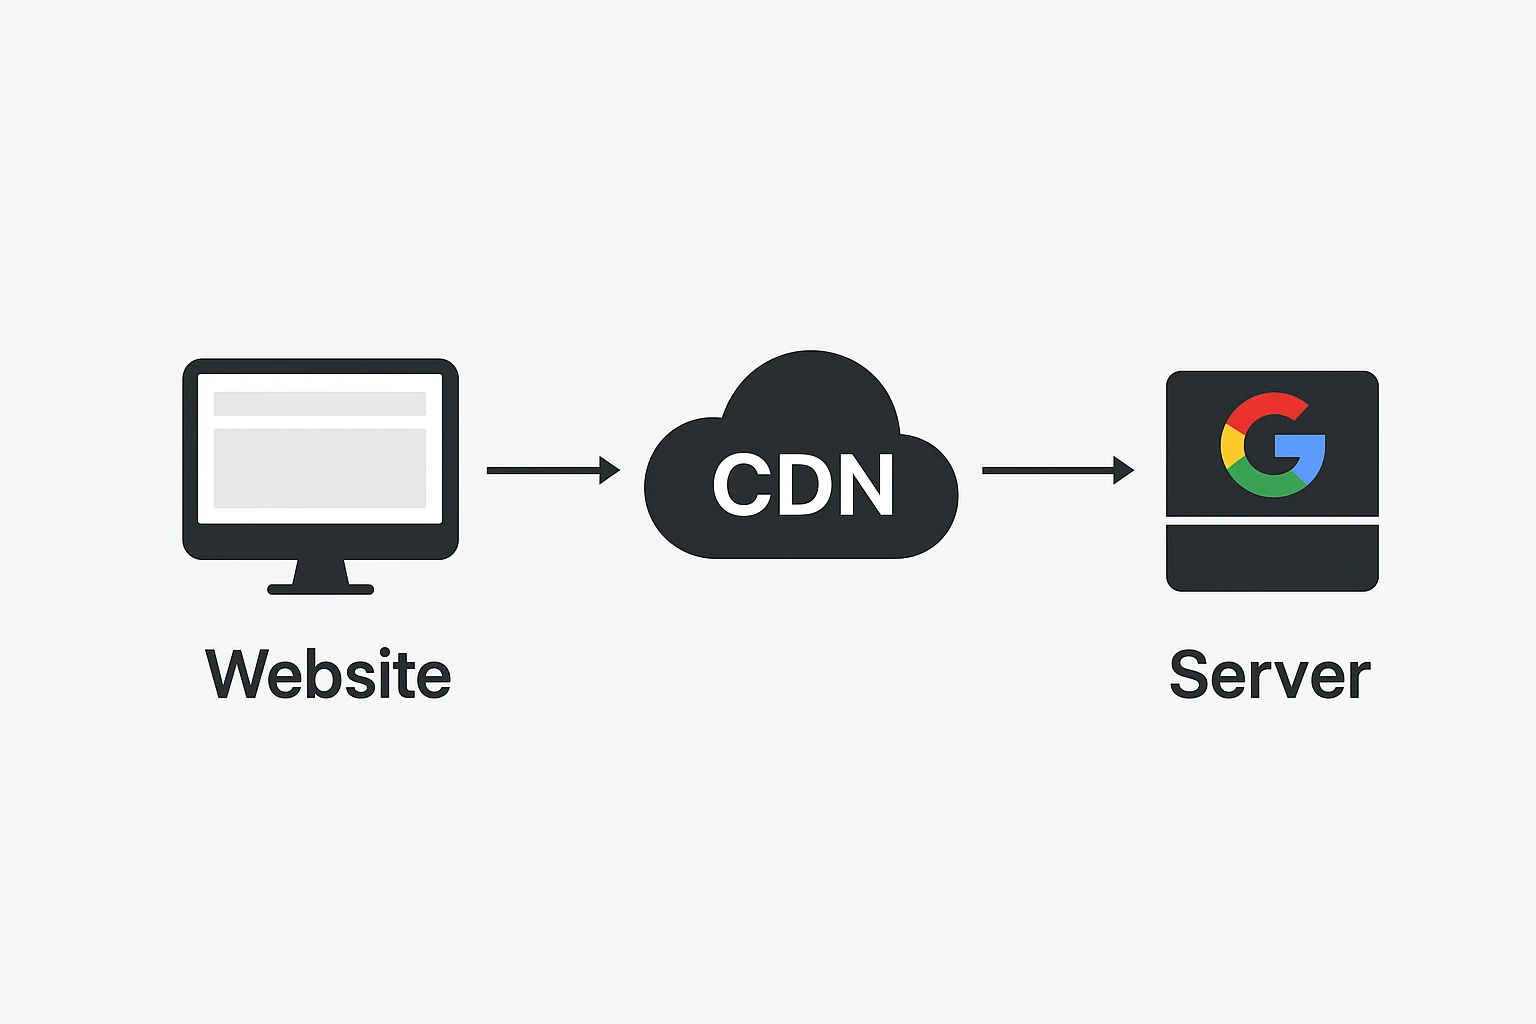
Enter Google Tag Gateway: a CDN-based solution that routes Google tags through your domain instead of googletagmanager.com. For advertisers, this means more reported conversions in Google Ads and Google Analytics by making third-party tags appear as first-party.
With setup options ranging from 15 minutes (automated) to under an hour (manual), this feature is positioned to become standard practice in Google tracking. Let’s explore how Google Tag Gateway works and how to implement it.
The Problem: Ad Blockers Are Killing Your Tracking
Normally, Google tags track users through JavaScript that loads directly from googletagmanager.com. This sends data directly to Google’s servers.
The Problem: These third-party requests can be easily blocked by ad blockers or cookieless browsers.
How Google Tag Gateway Solves This
Google Tag Gateway changes where the browser thinks it’s getting the tracking script. Instead of loading from googletagmanager.com, your tags now load from your own domain.
Example: googletagmanager.com/gtag.js → fiveninestrategy.com/tracking
Rather than use Google Tag Manager as the go-between for data sent to Google’s tools, data gets sent through your domain.
To browsers and ad blockers, this looks like a first-party request, and therefore much less likely to be blocked.
How This Differs from True Server-Side Tracking
Unlike a true server to server setup (like Facebook CAPI), Google Tag Gateway routes browser tags through your domain using a Content Delivery Network (CDN).
This restores much of the tracking lost to ad blockers, but doesn’t provide the redundancy of true server-side tracking where events can be deduplicated across multiple data sources.
The process still relies on browser execution, but instead using a third party (googletagmanager), the host domain will be used instead.
For a full breakdown of pros and cons, check out my sGTM vs Google Tag Manager comparison guide.
Benefits of Google Tag Gateway
This setup has several key benefits that differentiate it from traditional browser tracking or a server-side setup:
- Less technical setup: The process to set up GTG is far less technical than a true server-side setup.
- Recovers most lost tracking: 1st party tags are able to fire even when ad blockers or cookieless browsers are used, similar to how persistent UTM tracking maintains attribution data across sessions.
- Low cost: Tag Gateway is more cost-effective as it doesn’t require a server infrastructure.
Now that we’ve covered the benefits, let’s walk through the implementation process, which can be completed in under two hours even with the manual setup.
Google Tag Gateway Setup Methods
Google tag gateway has two primary methods for setup: an automated setup and manual setup.
For now the automated setup is only available through Cloudflare, so we’ll review both.
Automated Setup (Cloudflare Only)
Since Cloudflare is the most widely used CDNs in 2025, it makes sense that Google partnered with them to offer a fully automated setup.
If you’re using Cloudflare, you can complete this setup in under 15 minutes with the automated method below.
Step 1: Access Tag Gateway Setting
Login to Google Tag Manager and navigate to the ‘Admin’ section. In container settings, there will be an option for Google Tag Gateway.
This is where the configuration is set up.
Step 2: Choose a URL Path
Choose a measurement path like /tracking or /analytics that does not overlap with any other URL on your site. This will become your proxy URL.
Best practice: Google suggests a random 4-character path to avoid conflicts.
Step 3: Connect to Cloudflare
Sign into your Cloudflare account through the Google Tag Manager interface. You will need admin access to the Cloudflare account to grant permission.
Step 4: Select Domains
Choose the Cloudflare-managed domains that you would like to track and these will automatically be set up with Google Tag Gateway.
Note: Google can autodetect sites that have Google tags.
Step 5: Enable The Setup
Google automatically creates the routing rules in the backend of Cloudflare, removing any technical implementation by the website owner.
This automated setup can be completed in 15 minutes or less, enabling this setup for any advertiser regardless of technical expertise.
If you’re not using Cloudflare or prefer more control over the configuration, the manual setup process is straightforward and equally effective
Manual CDN Setup
Make sure to either have a developer or admin access to your website’s CDN to complete the process.
With this, the setup is straightforward and should take no more than 2 hours to complete.
Step 1: Choose a URL Path
You’ll need a URL path that serves as a proxy to Google, meaning it will only be used for the purpose of sending event information.
Example: fiveninestrategy.com/tracking OR fiveninestrategy.com/analytics
Just be sure that the path isn’t already being used so it doesn’t conflict with existing pages.
This URL path will be used in place of googletagmanager.com in the tag script implemented on your site.
googletagmanager.com/gtag.js → fiveninestrategy.com/tracking
Step 2: Setting Up Routing
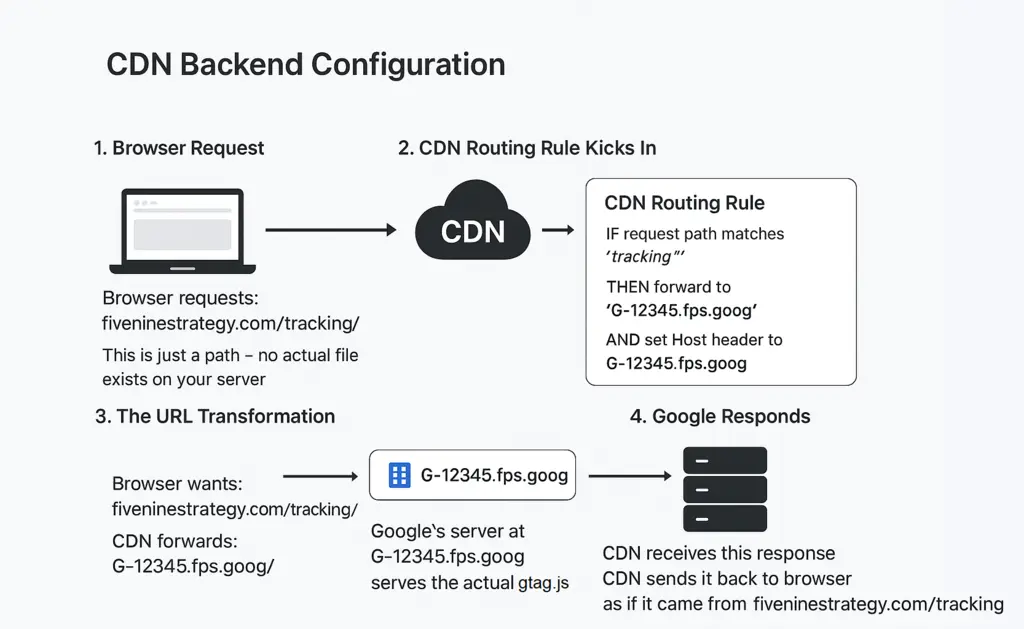
When someone visits a page of your site with fiveninestrategy.com/tracking in the page script, it triggers a request to your CDN.
In the backend of your CDN, create a rule that connects the URL path to Google’s endpoint:
IF request path matches “/tracking/*”
THEN forward to “G-12345.fps.goog”
AND set Host header to “G-12345.fps.goog”
Note: You’ll replace G-12345 with your measurement ID.
This creates a transformation where the browser requests your URL path and the CDN forwards the Google endpoint.
Google responds with the actual gtag.js file that loads conversion tags and the CDN sends it back to the browser through the first-party URL path.
Examples of CDN Logic
Each CDN will use slightly different logic to set up the transformation. Examples for two of the most popular CDNs – Azure and AWS CloudFront.
Azure Example:
Create Origin:
Origin Name: google-tag-gateway
Hostname: G-12345.fps.goog
Protocol: HTTPS only
Create Rule:
Rule Name: Google Tag Gateway
Condition: URL Path
- Operator: Begins with
- Value: /tracking
Action: Route Configuration Override
- Origin: google-tag-gateway
Add Header Rule:
Action: Modify Request Header
- Action: Overwrite
- Header Name: Host
- Value: G-12345.fps.goog
AWS CloudFront Example:
Create Origin:
Origin Domain: G-12345.fps.goog
Protocol: HTTPS Only
Origin Path: (leave empty)
Create Rule:
Path Pattern: /tracking/*
Origin: [select your Google origin]
Cache Policy: CachingDisabled (or create custom)
Origin Request Policy: CORS-S3Origin (or create custom)
Add Header Rule:
Name: GoogleTagGateway
Headers: Include the following headers
- Host: G-12345.fps.goog
Query Strings: Include all
Cookies: Include all
This creates the feedback loop wherein tag requests send your first party URL path and send back information using your domain. With this set up, the tag script on your website needs to be updated.
Step 3: Update Your Code
At this time, Google’s prebuilt tag in Google Tag Manager does not support URL path customization. That means the setup requires Google Tag to be setup using custom HTML.
The tag can be built like so:
<!-- Google tag (gtag.js) via Tag Gateway -->
<script async src="/tracking/"></script>
<script>
 window.dataLayer = window.dataLayer || [];
 function gtag(){dataLayer.push(arguments);}
 gtag('js', new Date());
 gtag('config', 'G-12345');
</script>
Key Note: Event tags like conversion tracking can still use pre-built tags in Google Tag Manager
Since the initial script is loaded as a first-party tag, all subsequent tracking calls will automatically use your domain as well.
With manual setup there are some additional considerations to keep in mind.
Testing Your Tag Gateway Setup
After completing setup, verify the Tag Gateway is working properly by following these steps.
Browser Tab Verification
The best way to check if your setup works properly is using the browser’s developer tools.
Step 1: Open Developer Tools
Right-click anywhere on the page and select ‘Inspect’. Navigate to the ‘network’ tab and refresh the page.
Step 2: Check Request
Use the filter bar at the top to search for ‘/tracking/’ or whatever URL path you used. Verify that these exist and include your website’s domain
Step 3: Verify Response
Click to open the request including your URL path and check that the response contains your Google tag code.
If you see 200 OK, then it’s set up properly.
Common Setup Errors and Fixes
There are a few common reasons that setup does not work as intended.
404 Error on Tracking Path
If the browser shows a 404 error or no Google Tag code loads, check:
- Measurement ID Format: G-XXXXXXXX.fps.goog
- CDN Rule Configuration: Make sure path matches exactly, no case variation.
Google Tag Code Doesn’t Load
If the tracking path is working but doesn’t contain the code, it means it’s not getting called correctly from Google’s server.
This is due to an incorrect setup in your CDN logic:
- Check Host Header Configuration: Ensure the measurement ID endpoint is correct and the CDN forwards it correctly.
- CDN Origin Settings: Confirm the measurement ID is noted correctly in the origin and HTTPS protocol is active.
Tag Gateway Working But No Data In Analytics
Browser testing was successful, but you aren’t seeing any data pass through to Google Ads or Analytics.
This most likely has to do with tag setup:
- Check Custom HTML tag is published.
- Confirm there aren’t filters on the data stream.
Most errors can be identified through QA using either Google Tag Manager or the Developer tools, though in rare cases you may have to contact your CDN’s support.
Important Considerations
Be mindful to consider the impact of several areas when setting up Tag Gateway:
- Compatibility: Enterprise firewalls or certain advanced ad blockers may continue to block tags.
- Performance: While small, this setup will add some latency to page load speed
- Cost: CDN usage is based on bandwidth and may incur additional cost (though minimal)
While small, these considerations can impact your implementation success, so be sure to monitor them as you roll out the feature.
For additional tracking enhancements, consider implementing privacy-compliant conversion tracking methods alongside Tag Gateway.
Whether you choose the automated Cloudflare integration or manual CDN setup, Google Tag Gateway provides a practical solution for improving tracking accuracy without the complexity of full server-side implementation.
Getting Started with Tag Gateway
Google Tag Gateway represents a significant shift in first-party tracking, offering advertisers a middle ground between traditional browser tags and complex server-side implementations.
With setup times ranging from 15 minutes (Cloudflare) to under an hour (manual), this approach recovers most tracking lost to ad blockers while maintaining the simplicity that makes Google tags accessible to marketers of all technical levels.
For even more accurate Google Ads attribution methods or comprehensive multi-touch attribution solutions, Tag Gateway serves as a solid foundation for enhanced measurement strategies.
As cookieless browsing continues to expand, Tag Gateway is positioned to become standard practice for Google tracking implementations.